PRECISION METROLOGY
Introduction
Metrology is
the scientific study of measurement. One
cannot embark on the pursuit of precision manufacturing without an equally
passionate journey into the challenges (and perils!) of precision metrology. So this document is intended to provide a
brief introduction to and overview of this complex subject. Here is a printed
version of these notes.
Precision Metrology is Hard Work!
The sooner
you accept the wise words of Israelle Widjaja, that “properly measuring things is hard,” the
sooner you’ll begin to understand how to make accurate and precise
measurements.
Rule of Ten
The Rule
of Ten (or Rule of One to Ten) states the discrimination (resolution)
of the measuring instrument should divide the tolerance of the characteristic
to be measured into ten parts. In other words,
the gage or measuring instrument should be at least 10 times as accurate as the
characteristic to be measured. Many
believe that this only applies to the instruments used to calibrate a gage or
measuring instrument when in reality it applies to the choice of instrument for
any precision measuring activity. The
whole idea here is to choose an instrument that is capable of detecting the
amount of variation present in a given characteristic (i.e. part feature).
To achieve reliable measurements,
the instrument needs to be accurate enough to accept all good parts and reject
all bad ones. Conversely the gage should
not reject good parts nor accept bad ones.
The real problem arises when an instrument is used that is only accurate
enough to measure in thousandths and accepts parts based upon that result and
the customer uses gages that discriminate to ten-thousandths and rejects parts
sent to them for being 0.0008” over or under the specification limit.
Practically speaking, this
means to reliably measure a part feature specified as +/- 0.0005” requires a
measurement tool with a resolution and an accuracy of 0.0001”.
Accuracy, Precision, and
Reproducibility
Accuracy refers to how close a measurement is to a true
(actual) value or a value accepted as being true.
Precision is a measure of the spread of different
readings (i.e. repeatability), and is completely unrelated to accuracy.
Reproducibility is the degree to which a measurement can be
reproduced or replicated by someone else working independently.
Got Calibration?
A measuring instrument is useless
if not calibrated regularly against a reliably calibrated gage.
Constant Force
A measuring instrument which
offers no constant contact force method of measurement can never have the same
level repeatability or reproducibility as one that does. In addition, a measuring instrument that does
provide constant contact force only works properly if the clutch or ratchet is
rotated at consistent velocity, so technique still matters.
NTP
Proper measurements should always
be conducted as close to NTP (normal temp and pressure) as possible (68°F &
1atm (14.7 psia)).
Be Careful!
Whenever possible, measure in an
environment that will not damage the part or measuring instrument if either is
dropped.
Never touch precision ground
surfaces (i.e. gage blocks, gage pins, calibration rings, precision measuring
surfaces, etc.) with your bare hands, as doing so will cause them to rapidly
corrode, ruining their accuracy. Always
wear gloves, remove any anti-corrosion protectant with WD-40 and a new blue
shop towel, and reapply anti-corrosion protectant (LPS) after use.
Never force any measurement
instrument. If a caliper or micrometer
won’t move freely, investigate why; most have a locking screw or cam, so check
that it’s not tight before damaging the instrument.
Cleanliness is Key
Clean the contact jaws or tips
with alcohol and a piece of tissue paper or a blue shop towel before use.
Got Zero?
Always remember to double check
the zero of the measurement instrument before use. This seems fundamental, but it’s surprisingly
easy to overlook when paying attention to so many other things. This means you will need to have calibration
gages or standards for instruments which are not self-zeroing (like a 0-1”
micrometers).
Thermal Growth
Understand metals have a typical
coefficient of linear expansion of 0.000010 in / (in-°F); therefore holding on
to a measuring instrument and/or a part long enough will cause a 4″
nominal part to change length 0.0012″ due to temperature change alone
(0.000010 in / (in-°F) x (4 in) x (30 °F) ≈ 0.0012 in)!
For this reason you should always
(well, whenever practically possible) use an indicator stand to hold a precision
measuring instrument and protect it from thermal growth due to body
temperature. In addition, you should
always allow adequate time for the part(s) being measured to reach NPT.
Multiple Measurements
Always take at least three
measurements to be “carelessly certain” of the ballpark value. The deviation between these measurements
should match the confidence you are seeking for the repeatability of your
measurements.
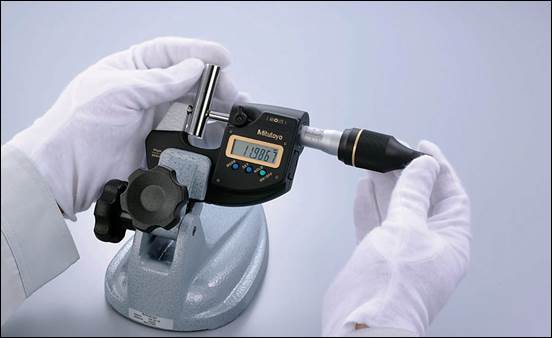
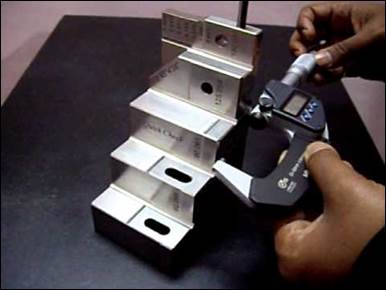
Gage Blocks and Gage Pins
Become proficient with gage
blocks and gage pins, as these are typically manufactured to ±0.000100″
or ±0.000050″ (depending on their grade rating), and are good for
moderate precision calibrations.
When using them, always wear
gloves, work over a safe surface in case you accidentally drop one (never over
the open box!), and coat them with rust inhibitor (LPS) when finished.

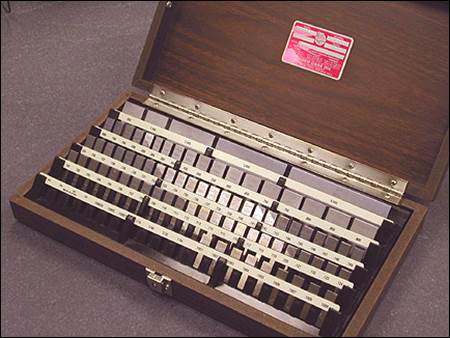
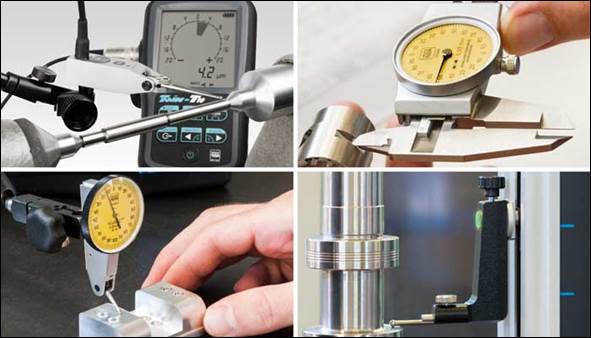
LEFT: Instructions on how to use
gage blocks (click image for video).
RIGHT: Use and care of gage blocks (click image for link).

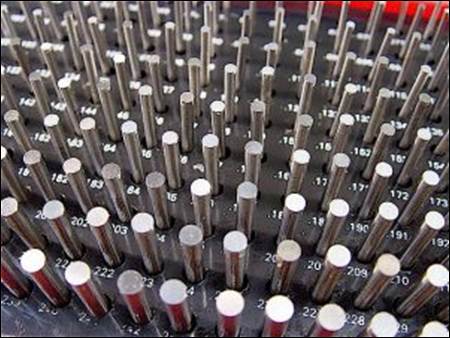
LEFT: Applications of gage pins
(click image for video). RIGHT: Example
of gage pin set.

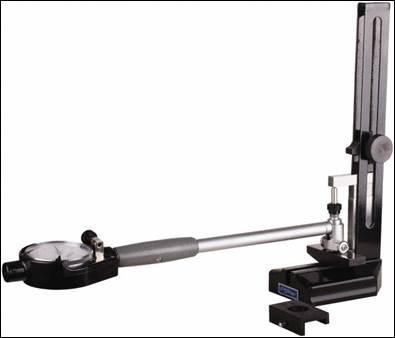
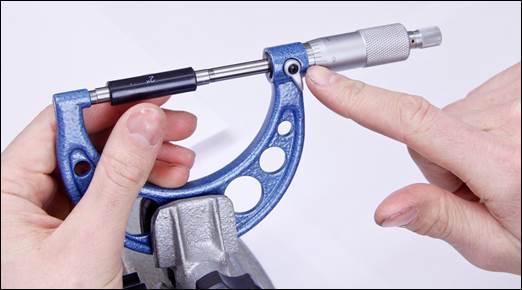
LEFT and RIGHT: Using gage blocks
to calibrate a micrometer and bore gage.
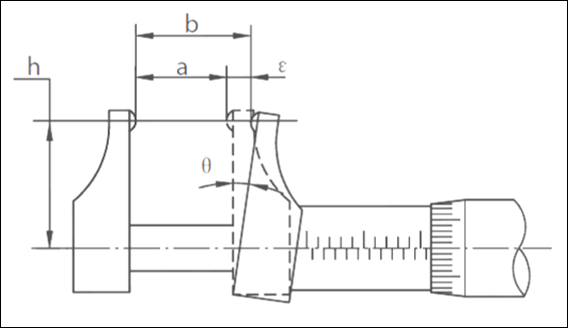
Abbé and Parallax Errors
Research Abbé error and parallax error to understand why calipers are not
regarded very highly in metrology circles J.
Abbé principle
states: “Only when datum lines of measuring system and measured workpiece are
on the same line, is a measurement most accurate.” As drawing shows, when there is distance (h)
between measuring faces and reading axis line, there will be measuring error
(ε = b-a = h tan θ).
Therefore, measuring force and tool distortion must be taken into
accounted during such measurement. Think
about what happens when the jaws of a dial caliper are zeroed by bringing their
flat surfaces into contact, and then a measurement is made without the jaws in
flat contact against the artifact.
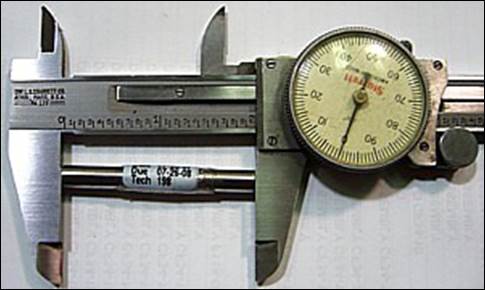
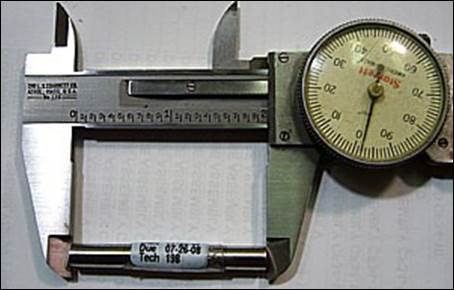
LEFT: Proper
method of calibration using a length standard; RIGHT: Additional Abbé
error introduced because of location of applied measurement force.
Parallax
error is a perceived shift in an object’s position as it is viewed from
different angles, and it is inherent in virtually every analog
measurement.

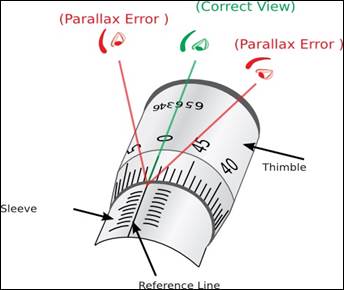
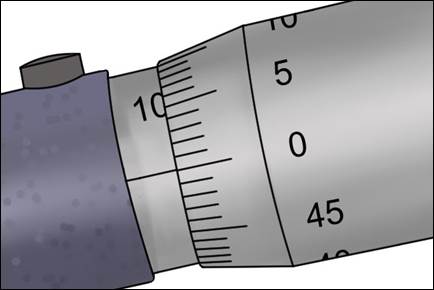
Parallax error when reading
a linear scale, as on a caliper (left) and when reading a vernier dial, as on a
micrometer (right).
Indicators
Since I
already have a document on indicators, I will simply include the link here.